Continuous Integration With Docker Cloud
Difficulty: Beginner
Time: Approximately 20 minutes
In this lab, you will learn how to configure a continuous integration (CI) pipeline for a web application using Docker Cloud’s automated build features. You will complete the following tasks as part of the lab:
What is Docker Cloud?
Docker Cloud is Docker’s cloud platform for individual developers and teams to build, ship, and run containerized applications. Docker Cloud enables teams to come together to collaborate on their projects and automate complex continuous delivery flows, which enables you to focus on improving your app, and leave the rest up to Docker Cloud.
Document conventions
When you encounter a phrase in between < and > you are meant to substitute in a different value.
For instance if you see ssh <username>@<hostname> you would actually type something like ssh ubuntu@node0-gvs0mgc0216.southcentralus.cloudapp.azure.com
You may be asked to SSH into various nodes. These nodes are referred to as node0, node1 etc. These tags correspond to the very beginning of the hostnames you will find in your welcome email.
Task 0: Prerequisites
In order to complete this lab, you will need the following:
- A Docker ID
- A management host (for this lab you’ll need a Linux named node0)
- A GitHub account
- Git installed
- Docker installed at the command-line
Obtain a Docker ID
If you do not already have a Docker ID, you will need to create one now. Creating a Docker ID is free, and allows you to use Docker Cloud.
If you already have a Docker ID, skip to the next prerequisite.
To create a Docker ID:
-
Use your web browser to visit
https://cloud.docker.com. -
On the right hand side of the screen, enter your preferred Docker ID, supply your email address, and choose a password.
-
Click
Sign up. -
Check your email (including your spam folder) for a confirmation email.
-
Follow the steps outlined in the email.
-
You should be redirected back to
https://cloud.docker.com.
You now have a Docker ID. Remember to keep the password safe and secure.
GitHub account
In order to complete the CI portions of this lab, you will need an account on GitHub. If you do not already have one, you can create one for free at GitHub.
Continue with the lab as soon as you have completed the prerequisites.
Task 1: Configure Docker Cloud to Automatically Build Docker Images
One of the most powerful features of Docker Cloud is the ability to define end-to-end CI/CD pipelines. In this part of the lab, you’re going to link your GitHub account to Docker Cloud to facilitate seamless application delivery.
Let’s start by linking your Docker Cloud account to your GitHub account:
-
Using your web browser, go to https://cloud.docker.com and sign in with your Docker ID.
-
Click the Cloud Settings link in the menu on the left hand side of the Docker Cloud web UI.
Note: If you cannot see menu on the left, un-select Swarm Mode at the top of the screen.
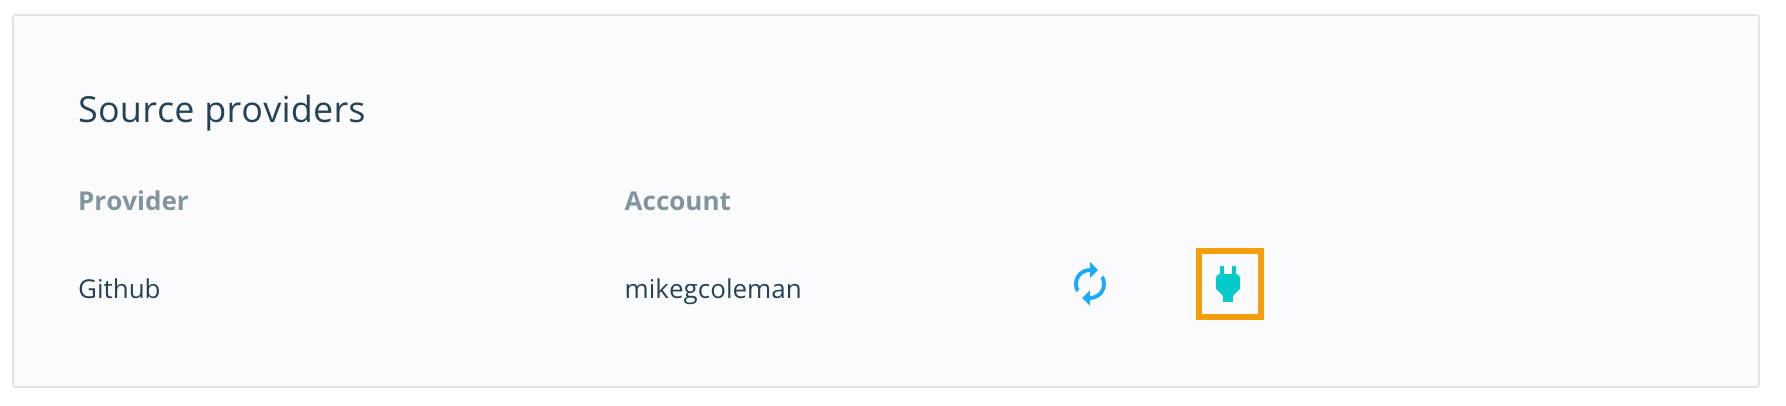
- Scroll down to the Source providers section. Click the power plug icon next to GitHub, and follow the procedure to link your GitHub account.
Now that you’ve got Docker Cloud linked to your GitHub account, we’ll start by forking a demo repo.
-
In your web browser, navigate to https://github.com/Cloud-Demo-Team/voting-demo.git.
-
Click the Fork button in the upper right hand corner to create your own copy of the source repository.
Next, we’ll clone the repository into our local Docker environment. The following commands will be executed in the terminal or command window from Linux node0
-
At the command line, change into the directory where you want to clone code.
-
Clone the repository (you will need to have
gitinstalled and thegitbinary present in your PATH).$ git clone https://github.com/<your github user name>/voting-demo.git Cloning into 'voting-demo'... remote: Counting objects: 481, done. remote: Total 481 (delta 0), reused 0 (delta 0), pack-reused 481 Receiving objects: 100% (481/481), 105.01 KiB | 0 bytes/s, done. Resolving deltas: 100% (246/246), done. Checking connectivity... done.
This will create a copy of the forked repo in a directory called voting-demo within your home directory.
Task 1.1: Configure Autobuilds
Docker Cloud can automatically build new images when updates are pushed to a repository on GitHub.
In this step, you’re going to build two GitHub repositories - one for the voting part of the app and one for the results part. You’ll configure two new repositories in Docker Cloud so that each time a change is pushed to the source repo an updated Docker image will be built.
-
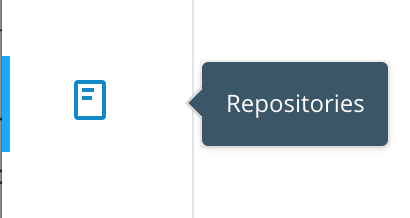
In your web browser, return to Docker Cloud and click the Repositories link on the left hand side.
-
Click the + icon near the top right of the page and select Repository.
-
Enter the following information in the Create Repository section:
- Name: results
- Description: Results service for the Docker voting app
- Visibilty: public
-
In the Build Settings section, you should see that your GitHub account is connected. Click the GitHub icon.
-
Make sure the your appropriate GitHub organization is populated from the drop down list, and select voting-demo for repository.
-
Select “Click here to customize the build settings” to configure the build rules.
-
Click Create at the bottom of the page.
You will be taken to the repository page.
Right now Docker Cloud doesn’t let you specify the build context when you create a repository, so you need to update the settings
- Navigate to the Builds page and click ‘Configure Automated Builds’. Scroll down to Build Rule, and set the Build Context to /results:

Create a second repository
Repeat steps 1-8 with the following modifications:
Create Repo (Step 3)
- Name: voting
- Description: Voting service for the Docker voting app
Specify the Dockerfile path (in Step 7):
- Enter /voting/Dockerfile for the Dockerfile Path
Check to make sure the repositories were created
If you click the Repositories menu on the left you should see both the voting and results respositories were created.
Well done! You’ve created two new repos and configured them to autobuild whenever new changes are pushed to the associated GitHub repos.
Task 1.2: Trigger an Autobuild
Switch back the command line of your VM.
-
If you have not already log into your Azure VM. For example (be sure to use the actual node name supplied in your email):
ssh ubuntu@node0-gvs0mgc0216.southcentralus.cloudapp.azure.com -
Change to the directory containing the voting app.
$ cd ~/voting-demo/voting - Use vi or your favorite text editor to open
app.py.- To use
vion Linux:$ vi app.py
- To use
-
Scroll down to find the lines containing
optionAandoptionB, and change Dev and Ops to Futbol and Soccer.optionA = "Futbol" optionB = "Soccer" -
Save your changes.
-
Commit changes to the repository and push to GitHub using
git add,git commit, andgit push.$ git add * $ git commit -m "changing the voting options" [master 2ab640a] changing the voting options 1 file changed, 3 insertions(+), 2 deletions(-) $ git push origin master Counting objects: 4, done. Delta compression using up to 8 threads. Compressing objects: 100% (4/4), done. Writing objects: 100% (4/4), 380 bytes | 0 bytes/s, done. Total 4 (delta 3), reused 0 (delta 0) To https://github.com/<your github repo>/voting-demo.git c1788a1..2ab640a master -> master
Note: You may be prompted to set your email and name when you attempt to commit your changes. If this is the case, simply follow the instructions provided on your screen.
Note: If you have two factor authentication (2FA) configured on your GitHub account you will need to enter your personal access token (PAT) instead of your password when prompted.
-
In the Docker Cloud web UI, navigate back to the voting repo and notice that the status is BUILDING.
Note: It can take several minutes for a build job to complete.

-
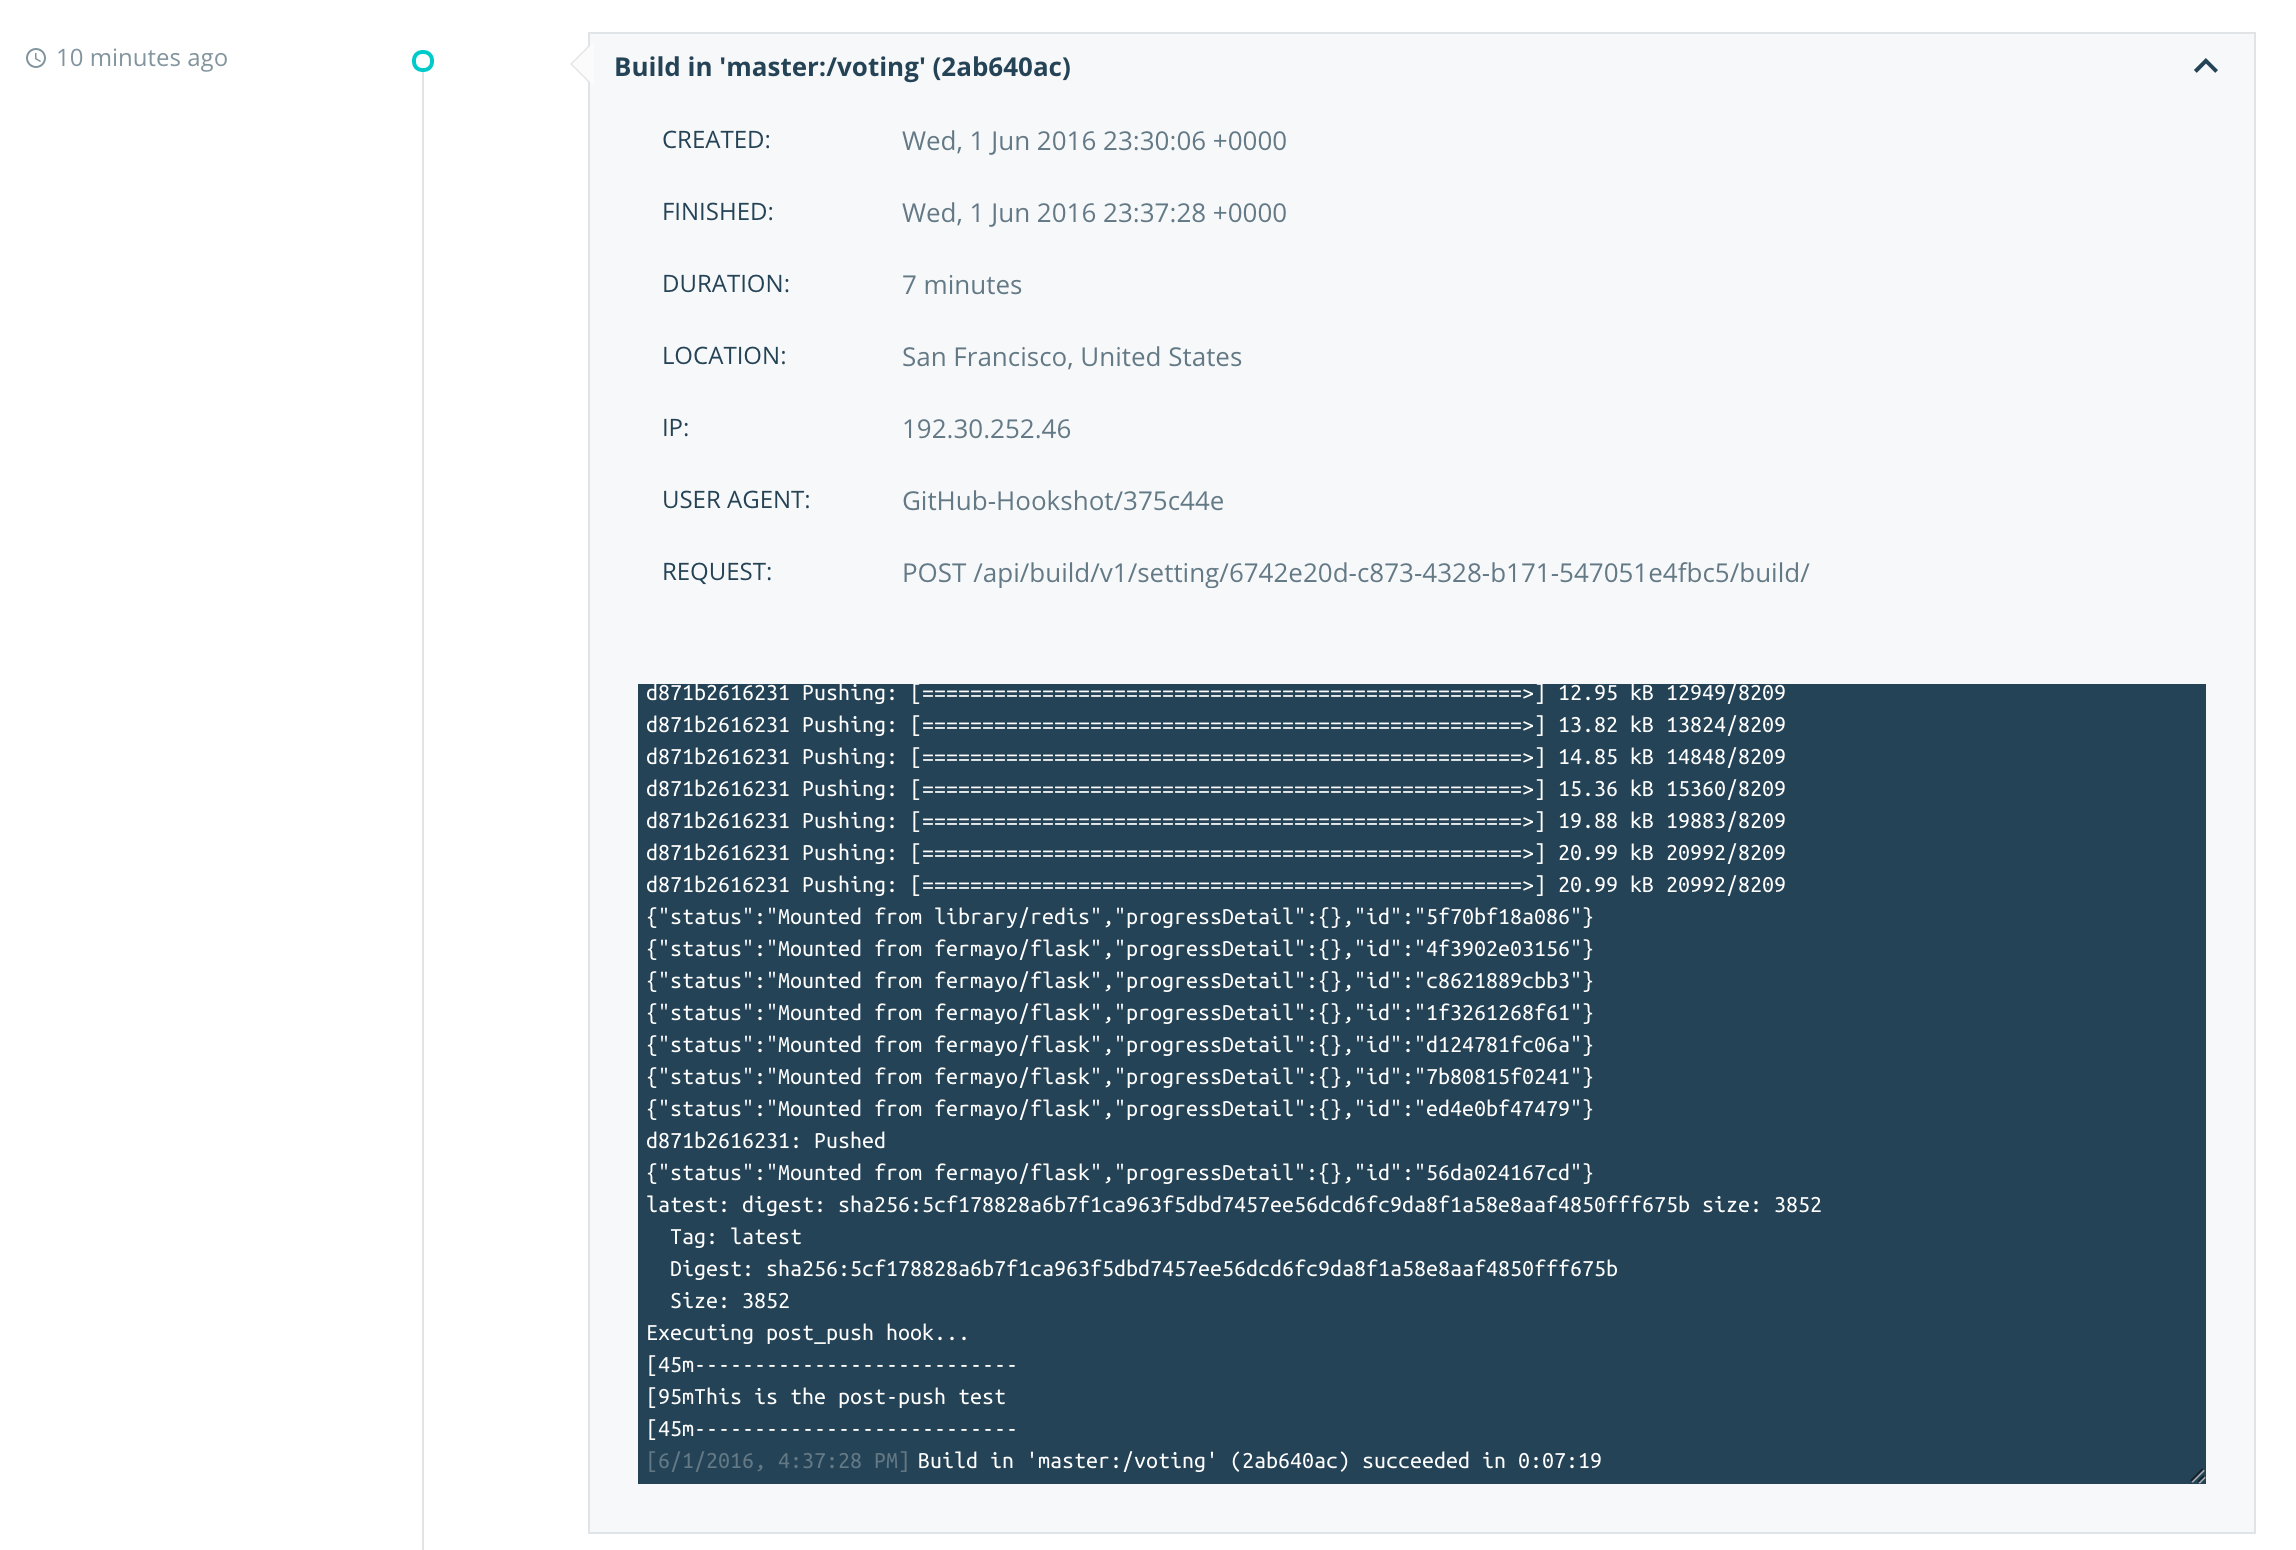
Click the Timeline tab near the top of the screen.
-
Click
Build in master:/voting.Here you can see the status of the build process:
Congratulations! You have successfully configured Docker Cloud to automatically build a new Docker image each time you push a change to your application’s repository on GitHub.
Learn More
To learn more about Docker Cloud’s continuous integration (CI) capabilities and how to bring more automation and collaboration to your application pipeline, check out:
- Video Automated Builds with Docker Cloud
- Docs: Automated Builds


