Docker registry for Linux Part 1
Introduction
A registry is a service for storing and accessing Docker images. Docker Hub and Docker Store are the best-known hosted registries, which you can use to store public and private images. You can also run your own registry using the open-source Docker Registry, which is a Go application in a Alpine Linux container.
What You Will Learn
You’ll learn how to:
-
run a local registry in a container and configure your Docker engine to use the registry;
-
generate SSL certificates (using Docker!) and run a secure local registry with a friendly domain name;
-
generate encrypted passwords (using Docker!) and run an authenticated, secure local registry over HTTPS with basic auth.
Note. The open-source registry does not have a Web UI, so there’s no interface like Docker Hub or Docker Store. Instead there is a REST API you can use to query the registry. For a local registry which has a Web UI and role-based access control, Docker, Inc. has the Trusted Registry product.
You’ll need Docker running on in this tutorial, or on a Linux machine and be familiar with the key Docker concepts, and with Docker volumes:
- Docker concepts
- Docker volumes
Part 1 - Running a Registry Container in Linux
There are several ways to run a registry container. The simplest is to run an insecure registry over HTTP, but for that we need to configure Docker to explicitly allow insecure access to the registry.
Docker expects all registries to run on HTTPS. The next section of this lab will introduce a secure version of our registry container, but for this part of the tutorial we will run a version on HTTP. When registering a image, Docker returns an error message like this:
http: server gave HTTP response to HTTPS client
The Docker Engine needs to be explicitly setup to use HTTP for the insecure registry. For this sample it has already been done, 127.0.0.1:5000 has already been added to the daemon.
** Running on your own Linux machine instead of in this browser window **
Edit or create /etc/docker/docker file:
vi /etc/docker/docker

# add this line
DOCKER_OPTS="--insecure-registry 127.0.0.1:5000"
Close and save the file, then restart the docker daemon.
pkill dockerd
dockerd > /dev/null 2>&1 &
** If you’re running on your own Mac or Windows machine instead of in this browser window **
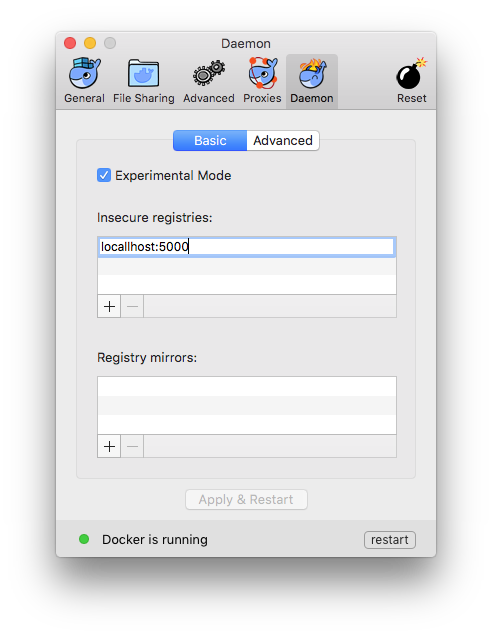
In Docker for Mac, the Preferences menu lets you set the address for an insecure registry under the Daemon panel:
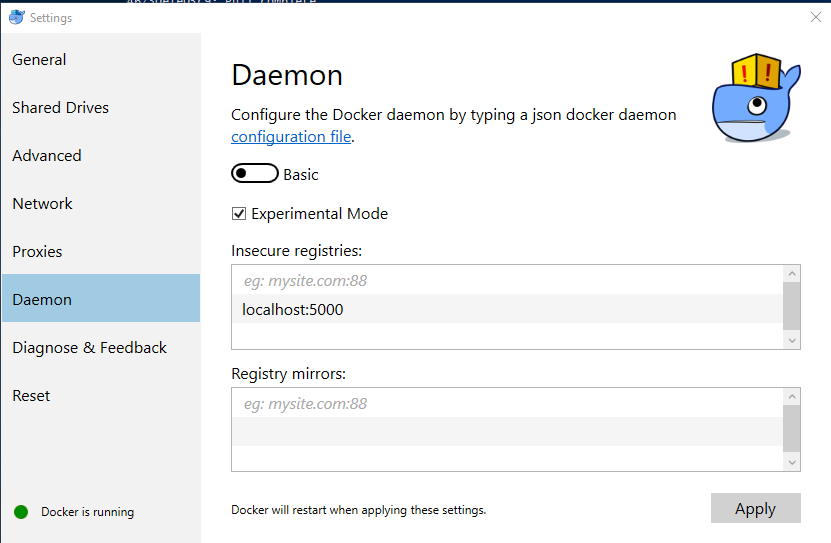
In Docker for Windows, the Settings menu lets you set the address for an insecure registry under the Daemon panel:
Testing the Registry Image
First we’ll test that the registry image is working correctly, by running it without any special configuration:
docker run -d -p 5000:5000 --name registry registry:2
Understanding Image Names
Typically we work with images from Docker Store, which is the default registry for Docker. Commands using just the image repository name work fine, like this:
docker pull hello-world
hello-world is the repository name, which we are using as a short form of the full image name. The full name is docker.io/hello-world:latest. That breaks down into three parts:
docker.io- the hostname of the registry which stores the image;hello-world- the repository name, in this case in{imageName}format;latest- the image tag.
If a tag isn’t specified, then the default latest is used. If a registry hostname isn’t specified then the default docker.io for Docker Store is used. If you want to use images with any other registry, you need to explicitly specify the hostname - the default is always Docker Store.
With a local registry, the hostname and the custom port used by the registry is the full registry address, e.g. 127.0.0.1:5000. In this sample we’ll just be using 127.0.0.1:5000 as that’s already been added to the daemon.
Pushing and Pulling from the Local Registry
Docker uses the hostname from the full image name to determine which registry to use. We can build images and include the local registry hostname in the image tag, or use the docker tag command to add a new tag to an existing image.
These commands pull a public image from Docker Store, tag it for use in the private registry with the full name 127.0.0.1:5000/hello-world, and then push it to the registry:
docker tag hello-world 127.0.0.1:5000/hello-world
docker push 127.0.0.1:5000/hello-world
When you push the image to your local registry, you’ll see similar output to when you push a public image to the Hub:
The push refers to a repository [127.0.0.1:5000/hello-world]
a55ad2cda2bf: Pushed
cfbe7916c207: Pushed
fe4c16cbf7a4: Pushed
latest: digest: sha256:79e028398829da5ce98799e733bf04ac2ee39979b238e4b358e321ec549da5d6 size: 948
On your machine, you can remove the new image tag and the original image, and pull it again from the local registry to verify it was correctly stored:
docker rmi 127.0.0.1:5000/hello-world
docker rmi hello-world
docker pull 127.0.0.1:5000/hello-world
That exercise shows the registry works correctly, but at the moment it’s not very useful because all the image data is stored in the container’s writable storage area, which will be lost when the container is removed. To store the data outside of the container, we need to mount a host directory when we start the container.
Running a Registry Container with External Storage
Remove the existing registry container by removing the container which holds the storage layer. Any images pushed will be deleted:
docker kill registry
docker rm registry
In this example, the new container will use a host-mounted Docker volume. When the registry server in the container writes image layer data, it appears to be writing to a local directory in the container but it will be writing to a directory on the host.
Create the registry:
mkdir registry-data
docker run -d -p 5000:5000 --name registry -v $(pwd)/registry-data:/var/lib/registry registry
Tag and push the container with the new IP address of the registry.
docker pull hello-world
docker tag hello-world 127.0.0.1:5000/hello-world
docker push 127.0.0.1:5000/hello-world
Repeating the previous docker push command uploads an image to the registry container, and the layers will be stored in the container’s /var/lib/registry directory, which is actually mapped to the $(pwd)/registry-data directory on your machine. Storing data outside of the container means we can build a new version of the registry image and replace the old container with a new one using the same host mapping - so the new registry container has all the images stored by the previous container.
Using an insecure registry isn’t practical in multi-user scenarios. Effectively there’s no security so anyone can push and pull images if they know the registry hostname. The registry server supports authentication, but only over a secure SSL connection. We’ll run a secure version of the registry server in a container next.


