In-container Java Development: Intellij
Note: This tutorial requires you to run your app locally on your own computer
Pre-requisites
Getting Started
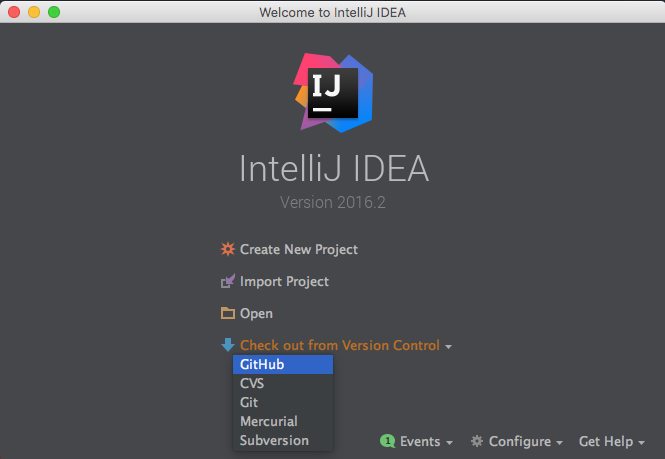
In IntelliJ, clone the repository. Click on Check out from Version Control > Github
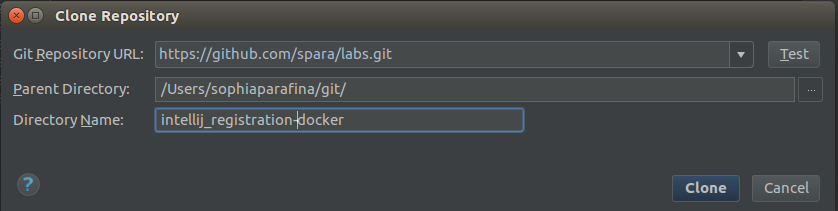
If this the first time to use IntelliJ with Github, log into your Github account.

On the command line clone the docker/labs repository
 Click on
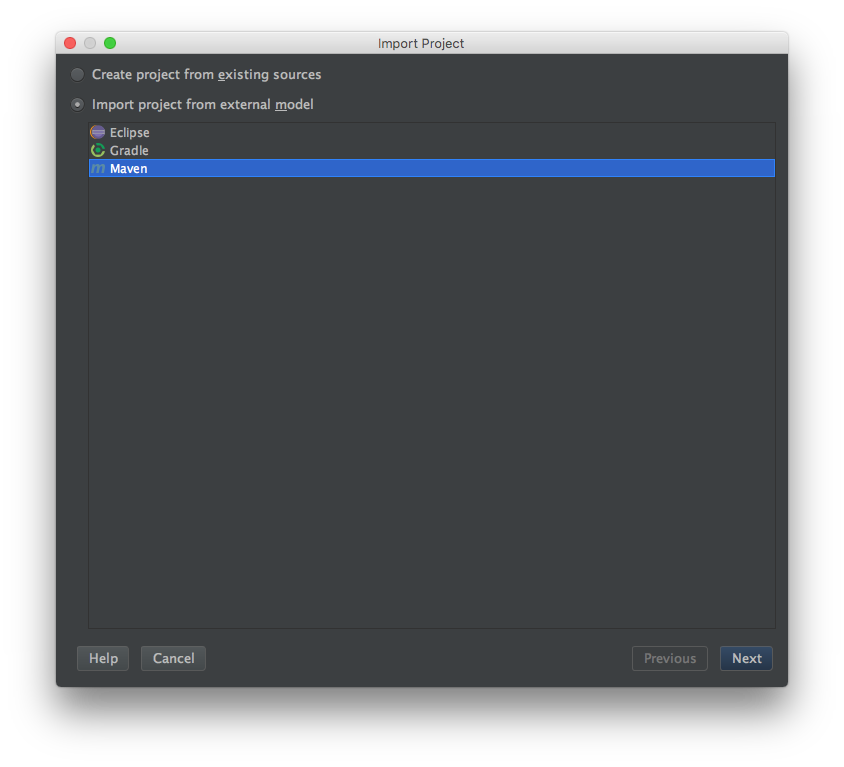
 Import project from external model, select Maven. Click Next
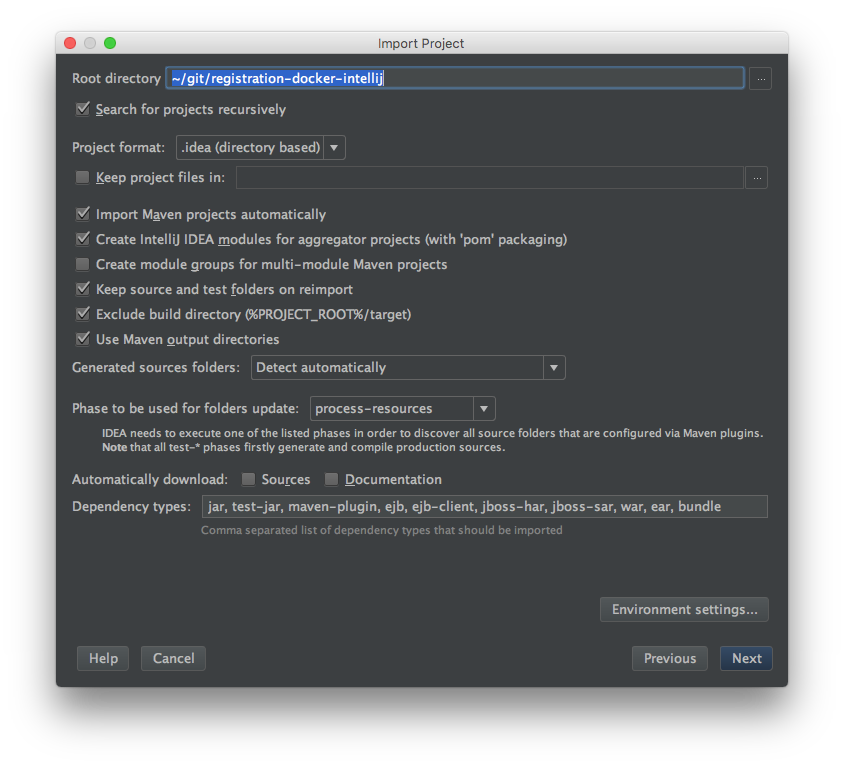
Check Search for projects recursively. Click Next
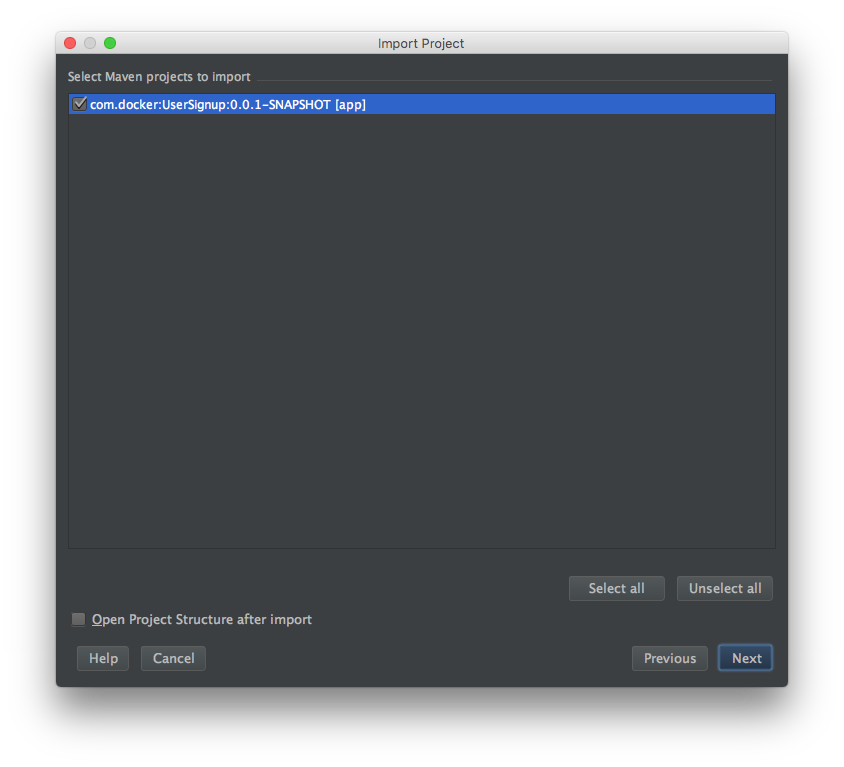
Select the project and click Next
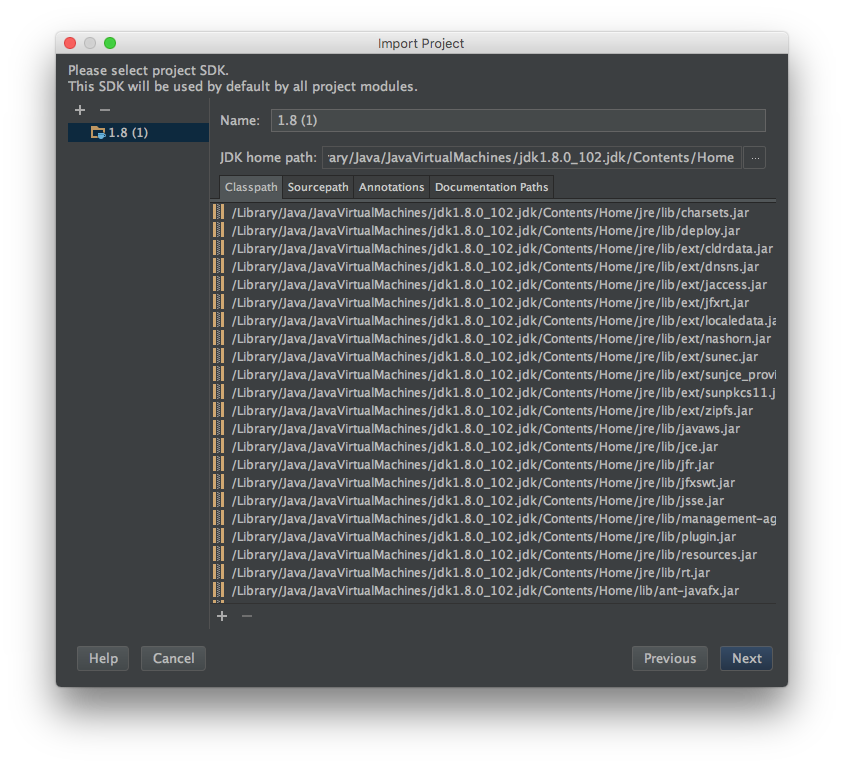
Select the JDK(set the JDK home path) and click Next
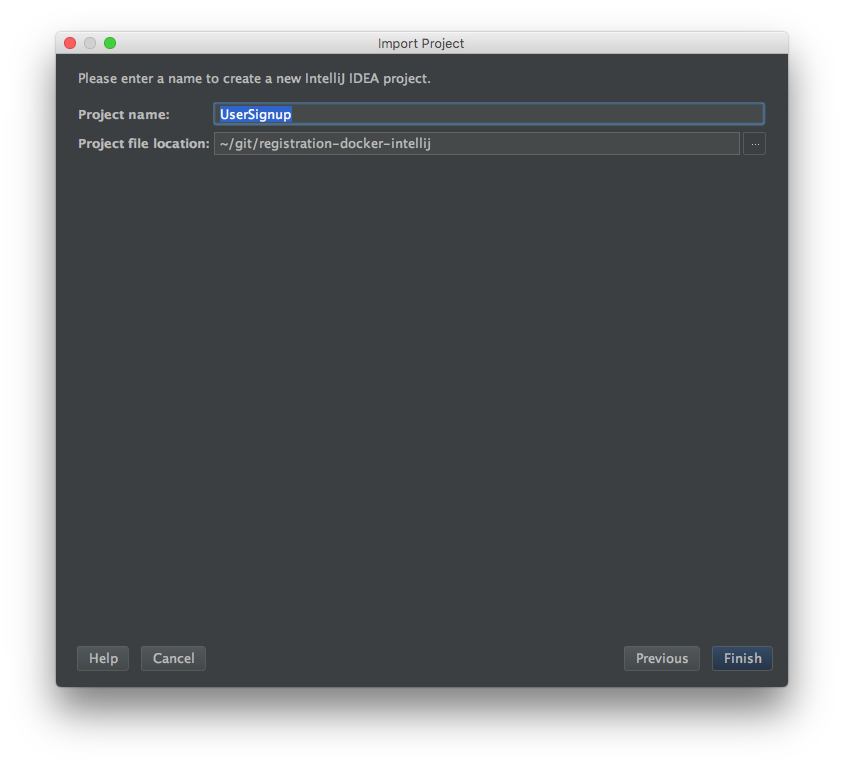
Click Finish
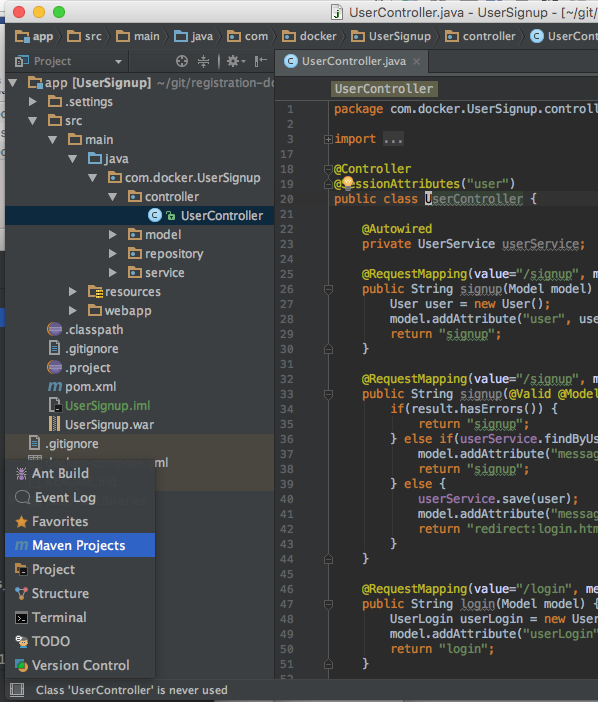
Click on Project View to open the project.

Building the application
The application is a basic Spring MVC application that receives user input from a form, writes the data to a database, and queries the database.
The application is built using Maven. To build the application click on icon on the bottom left of the IntelliJ window and select Maven Projects.
The Maven Projects window will open on the right side. Maven goals of clean and install need to be set to build the application.
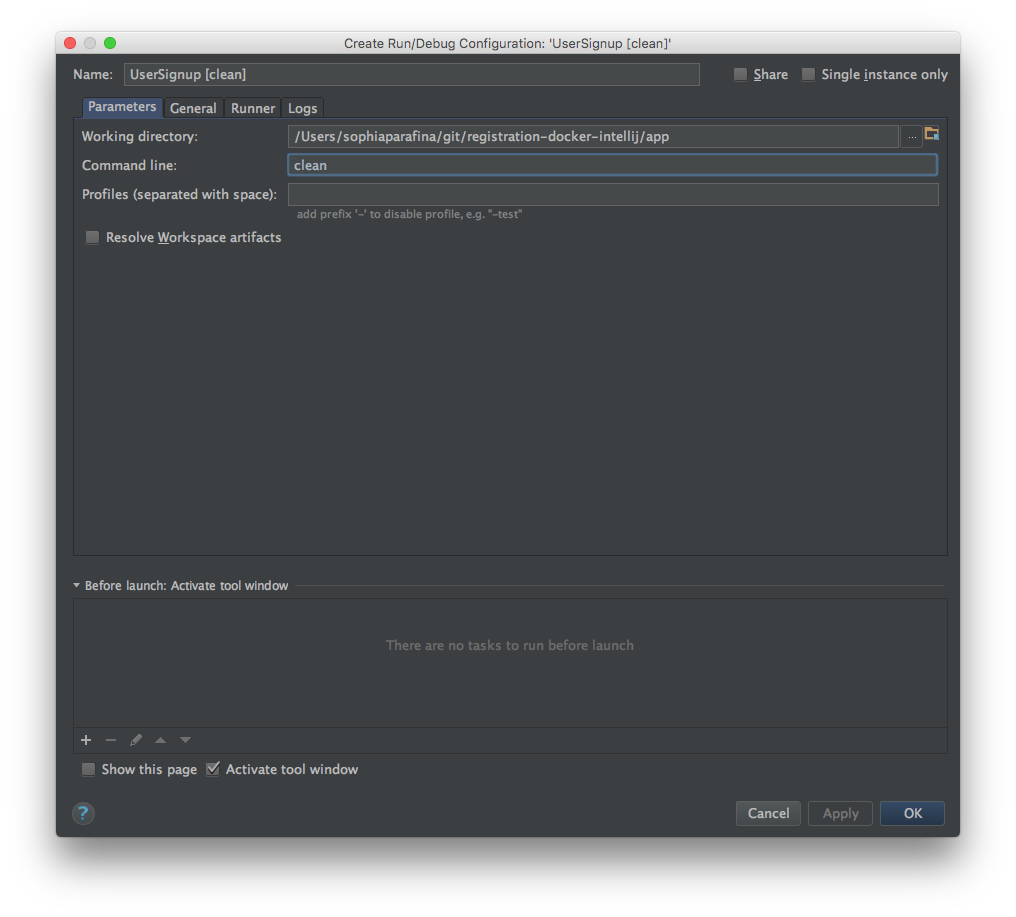
To set the clean goal, click on Lifecycle to display the tree of goals. Right click on clean and select Create 'UserSignup [clean]'...
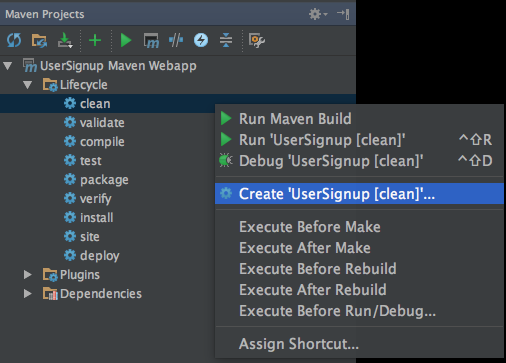
Click OK in the Create Run/Debug Configuration window.
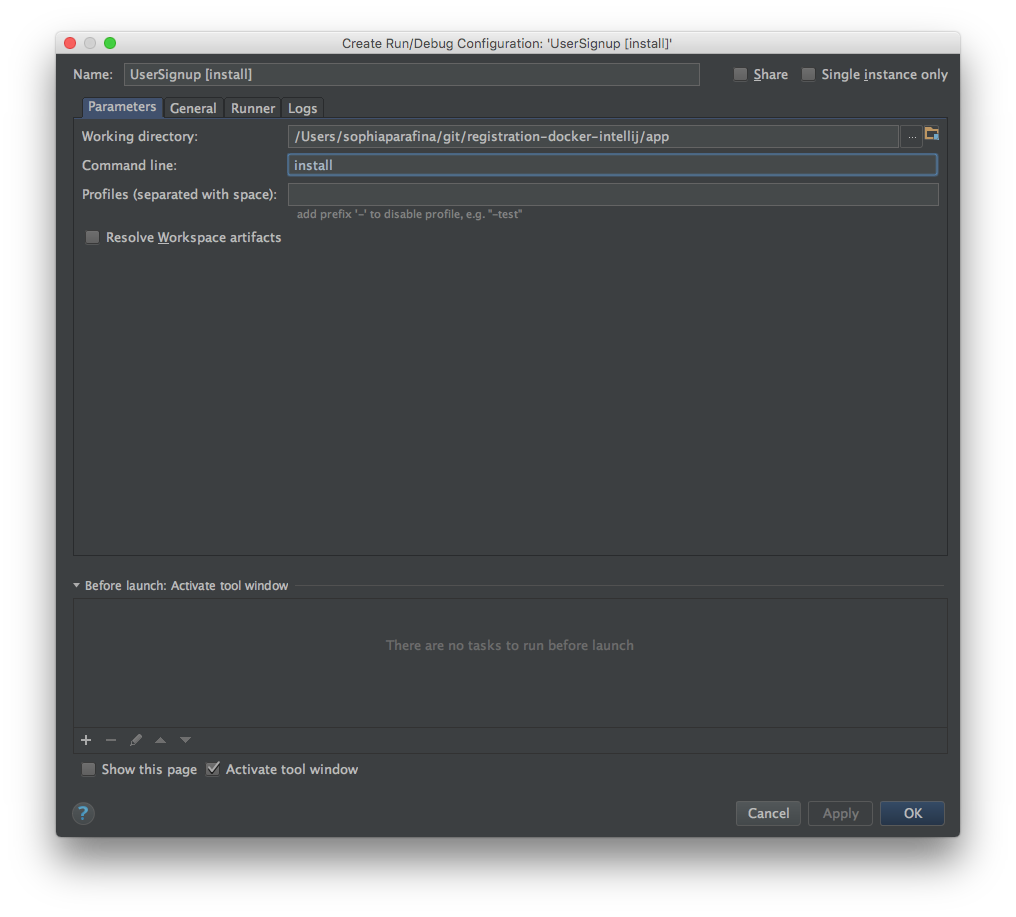
Configure the install goal similarly. Click on install in the Lifecycle tree. Select Create 'UserSignup[install]'...
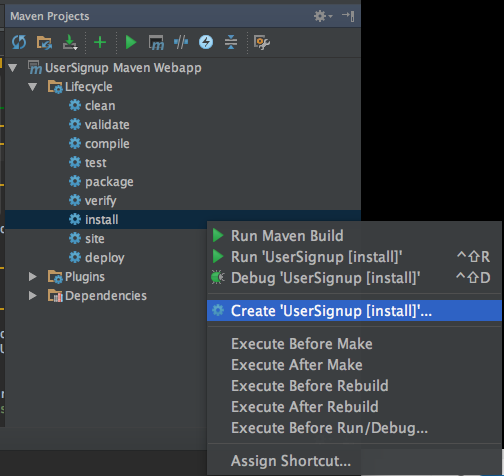
Click OK in the Create Run/Debug Configuration window.
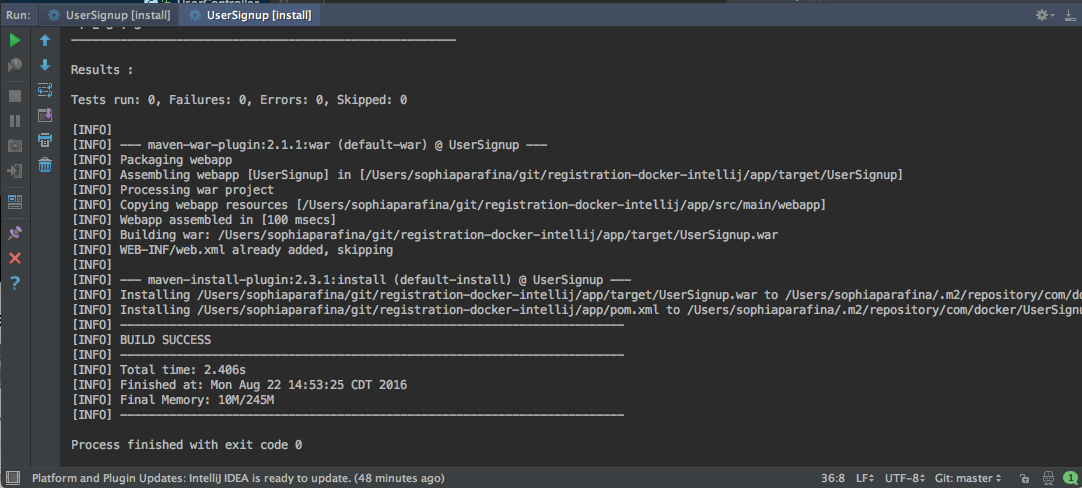
To build the application run clean

Then run install

When the application builds, you will see a success message in the log window.
Running the application
Open a terminal and go to the application directory. Start the application with docker-compose
> docker-compose up
Docker will build the images for Apache Tomcat and MySQL then start the containers. It will also mount the application directory (./app/target/UserSignup) as a data volume on the host system to the Tomcat webapps directory in the web server container.
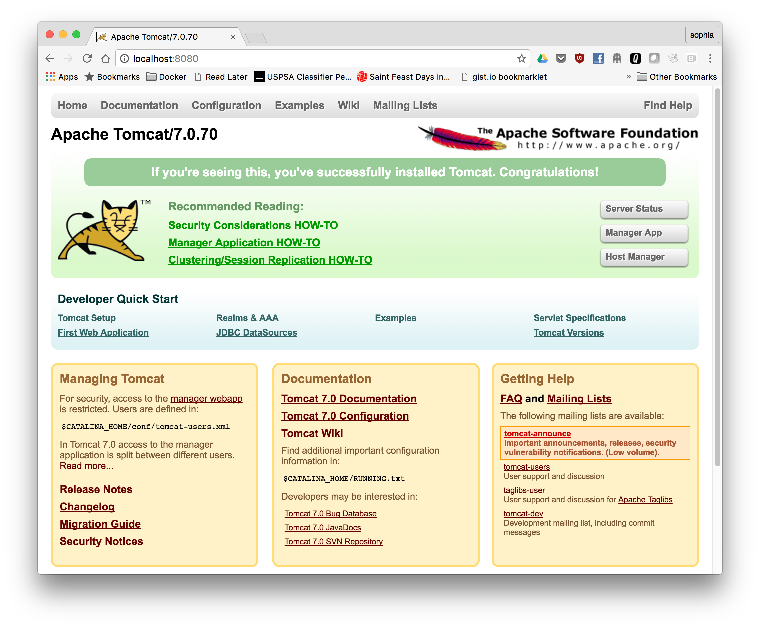
Open a browser window and go to: ‘localhost:8080’; you should see the Tomcat home page
When the Tomcat image was built, the user roles were also configured. Click on the Manager App button to see the deployed applications. When prompted for username and password, enter system and manager respectively to log into the Tomcat Web Application Manager page.
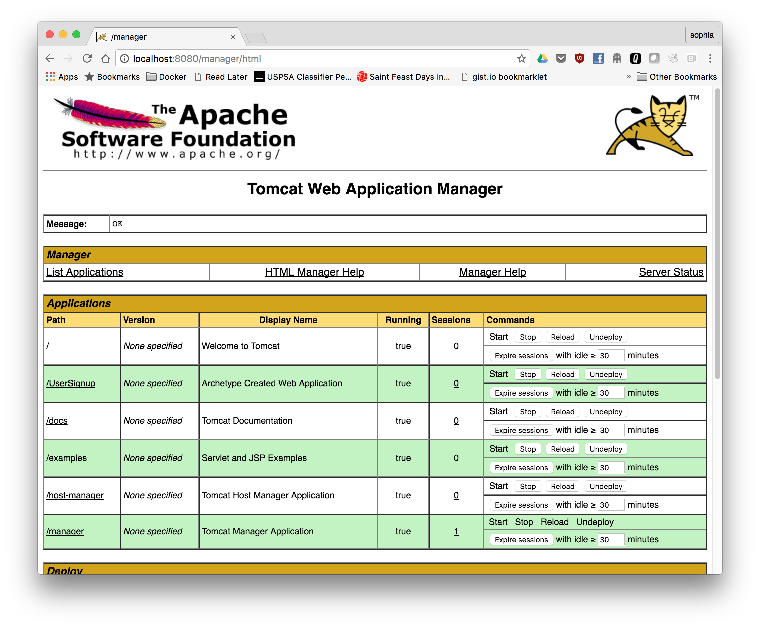
You can use the Manager page to Start, Stop, Reload or Undeploy web applications.
To go to the application, Click on /UserSignup link.
Debugging the Application
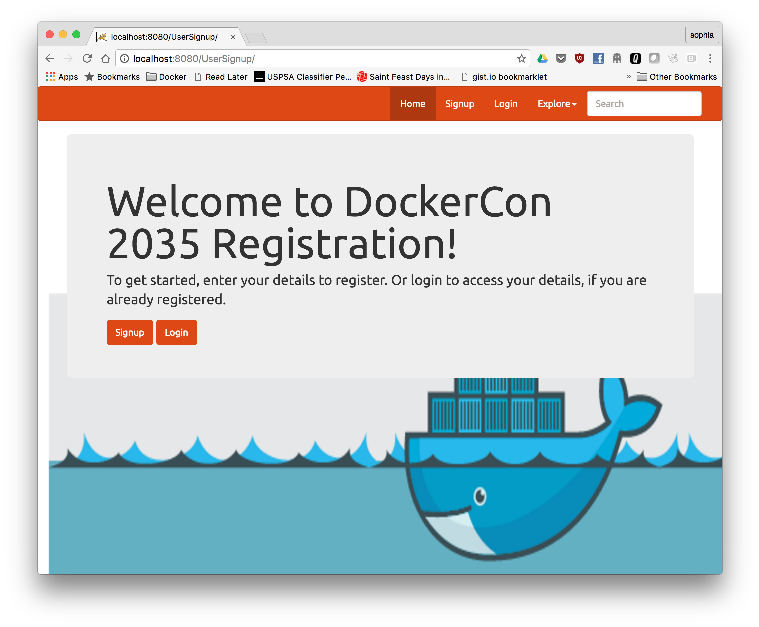
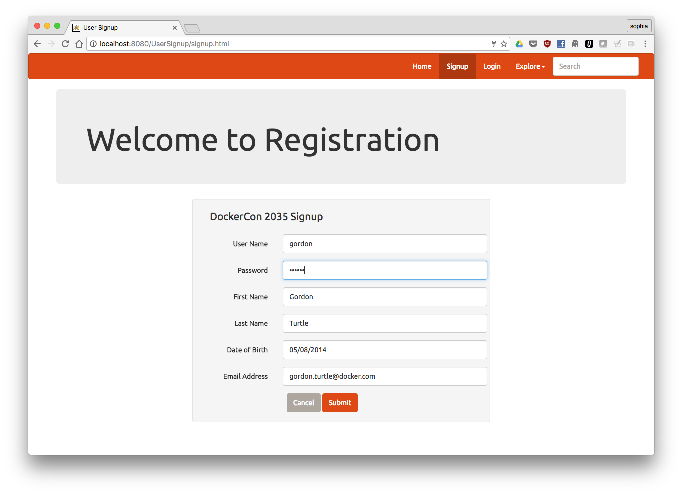
In the application, click on Signup to create a new user. Fill out the registration form and click Submit
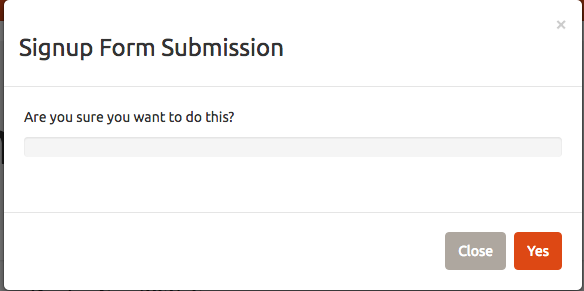
Click Yes to confirm.
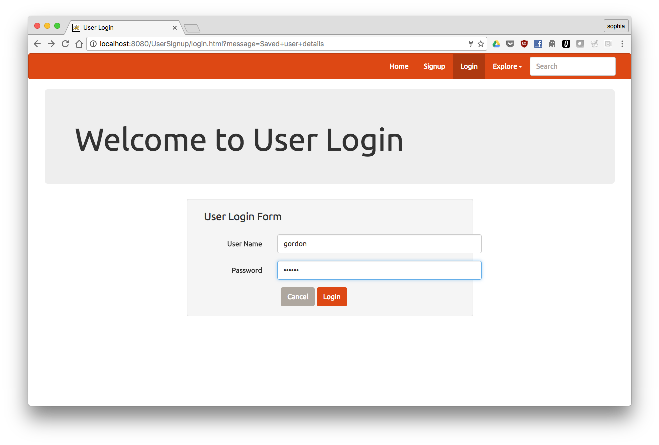
Test out the login.
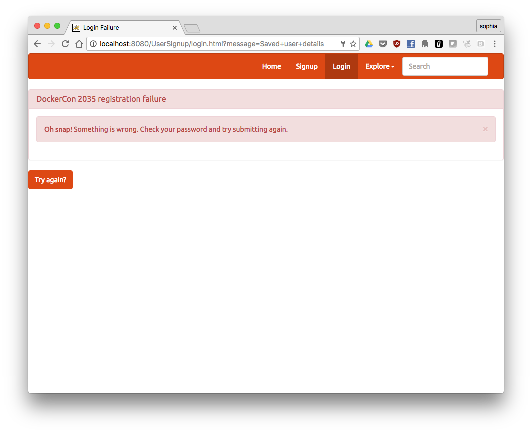
Oh no!
Configure Remote Debugging
Tomcat supports remote debugging the Java Platform Debugger Architecture (JPDA). Remote debugging was enabled when the tomcat image (registration-webserver) was built.
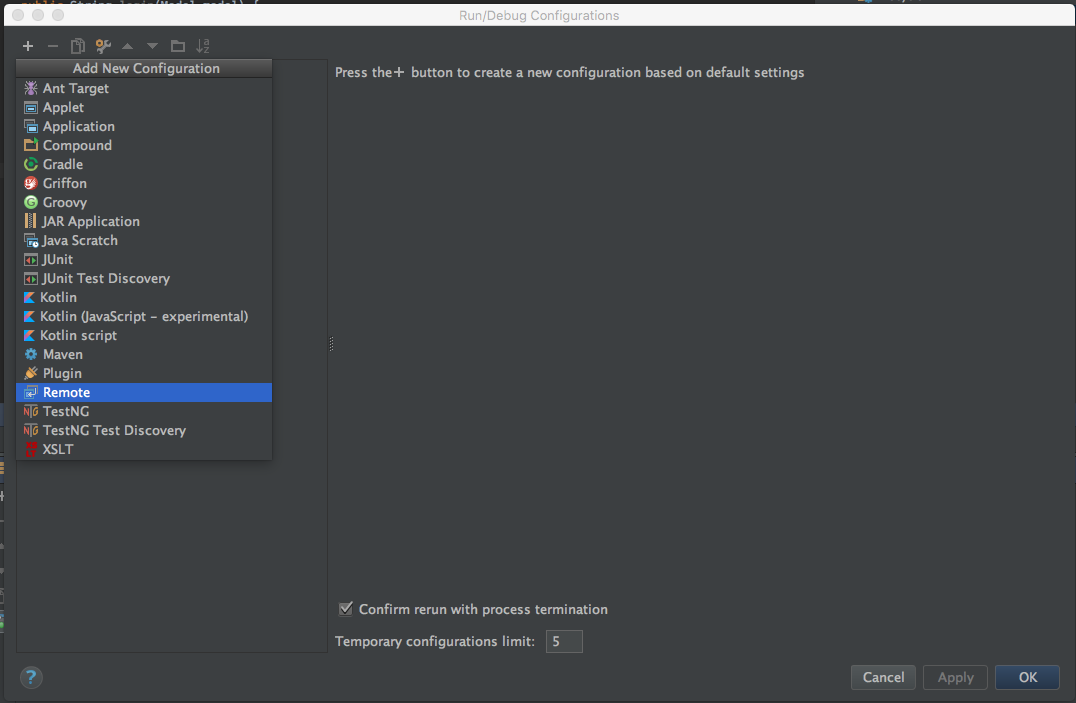
To configure remote debugging in IntelliJ, click on Run > Edit Configuration ...
Add a new remote configuration.
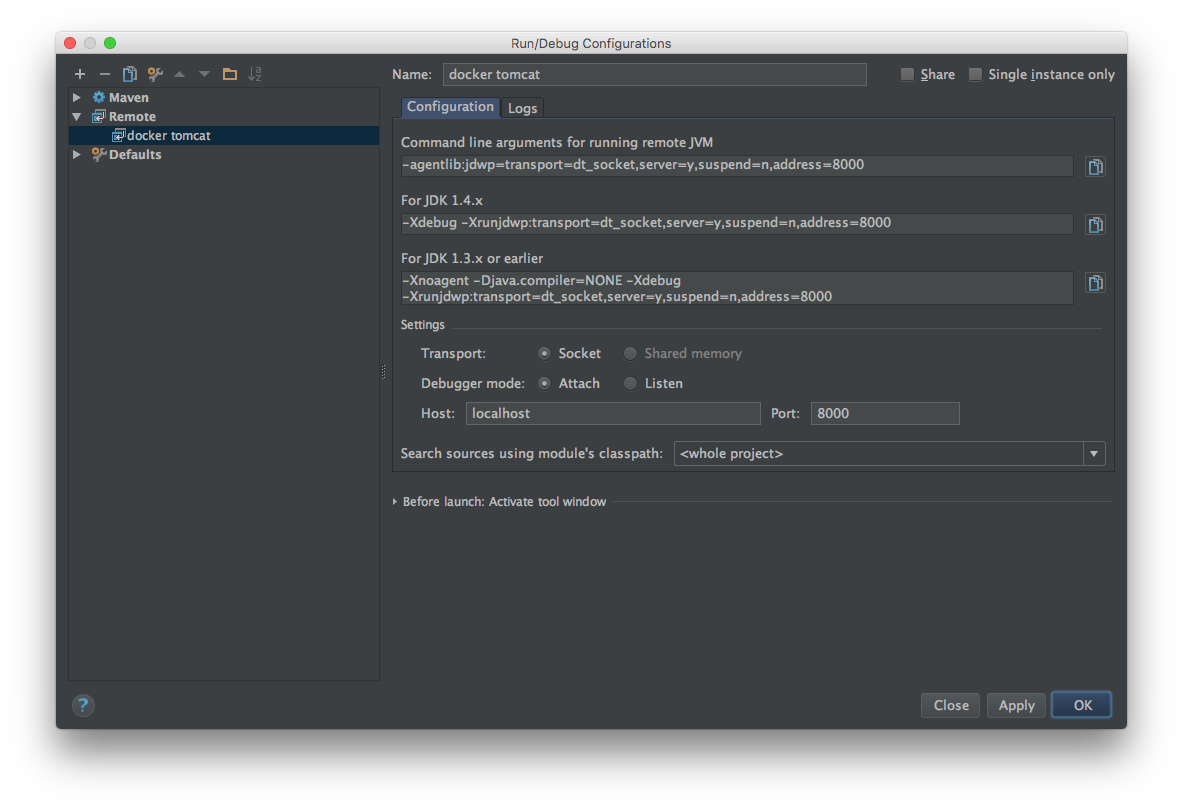
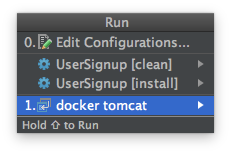
In the Run\Debug Configurations window, set the Name of the configuration as docker tomcat and in Settings set the port to ‘8000’ as the default Tomcat JPDA debuging port. Click on OK to save the configuration.
Finding the Error
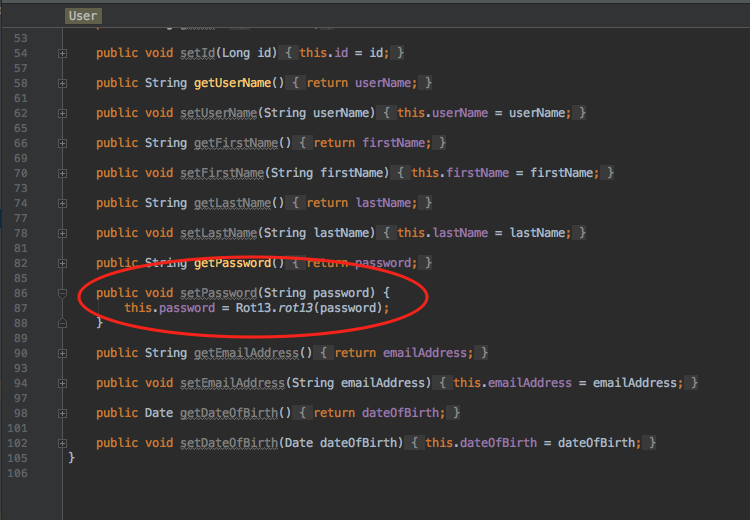
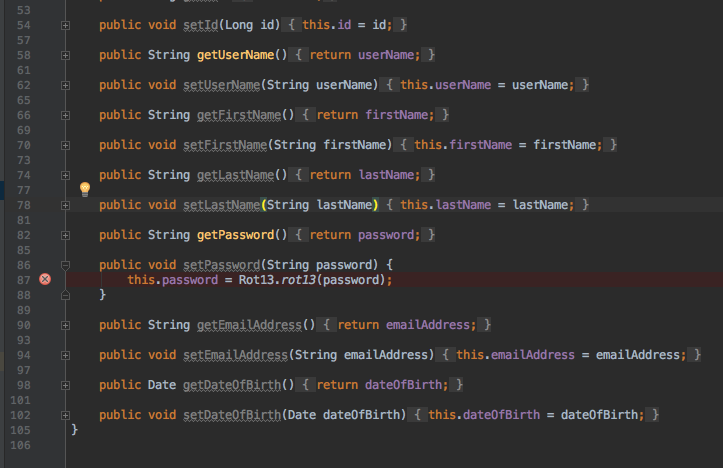
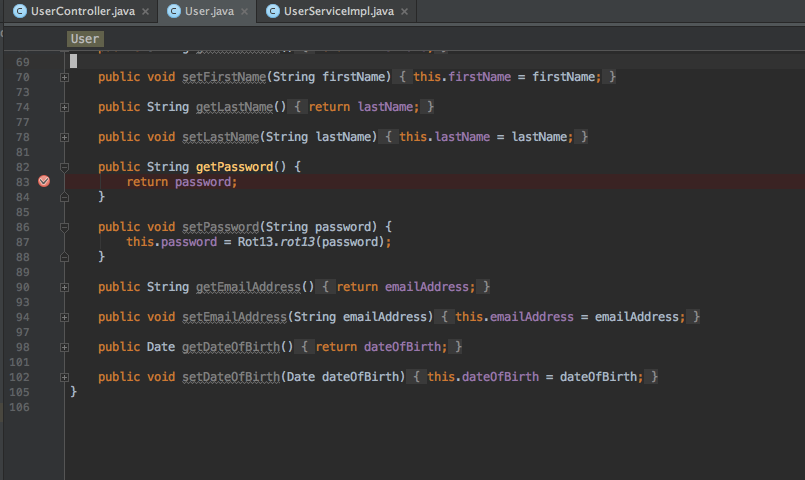
Since the problem is with the password, let’s see how the password is set in the User class. In the User class, the setter for password is scrambled using rot13 before it is saved to the database.
Try registering a new user using the debugger. In the menu click on Run > Debug...
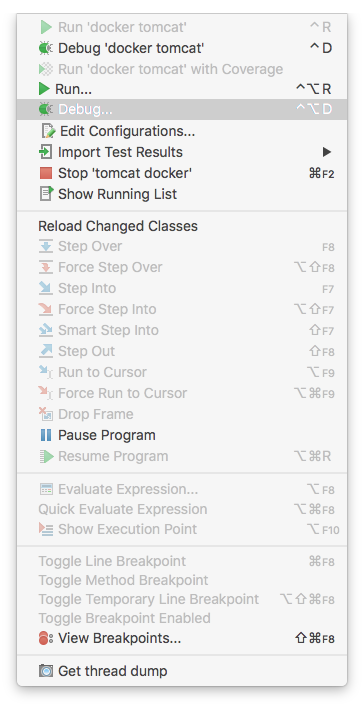
Choose the remote Tomcat debug configuration. The Debugger console will be displayed at the bottom of the IntelliJ window.
Set a breakpoint in the User class where the password is set.
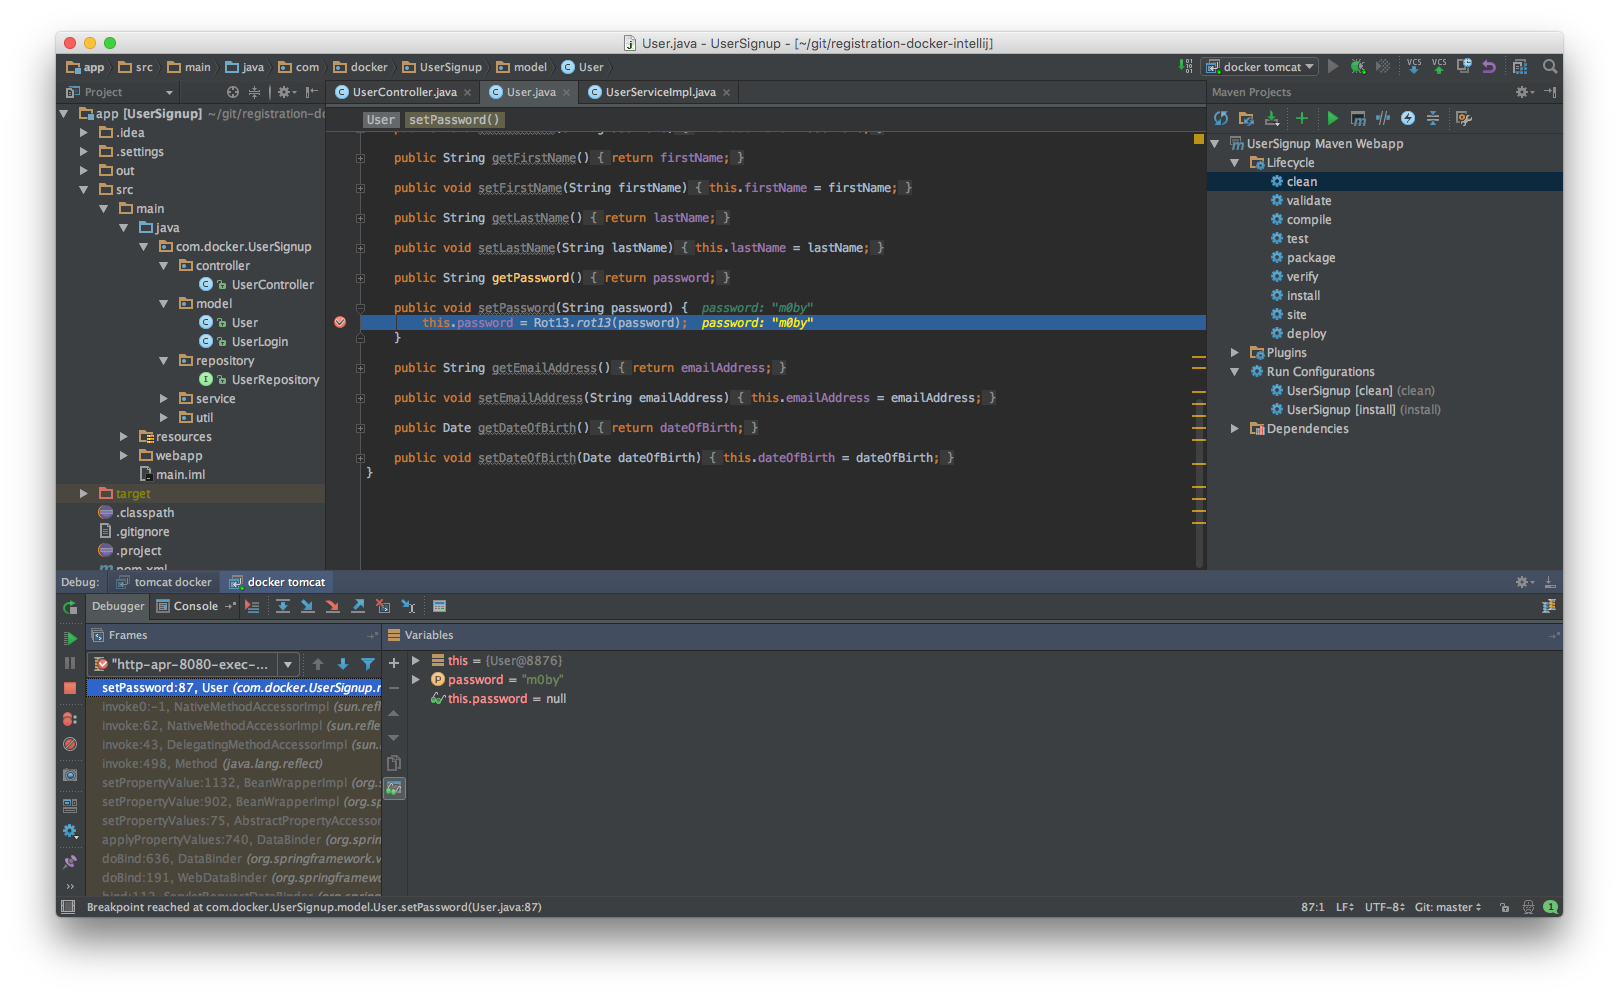
Register a new user with the username of ‘Moby’ and with ‘m0by’ as the password, click Submit, click yes

IntelliJ will display the code at the breakpoint and the value of password in the variables window. Note that the value is m0by
Click on Resume Program to let the code run or press F8 to step over the breakpoint.
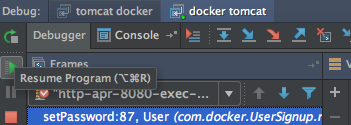
Next, set a breakpoint on the getPassword in the User class to see the value returned for password. You can also toggle off the breakpoint for setPassword.
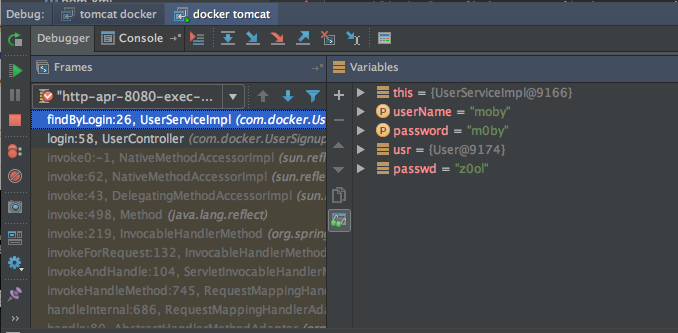
Try to log into the application. Look at the value for password in the debugging console, note that it is z0ol which is m0by using ROT13.
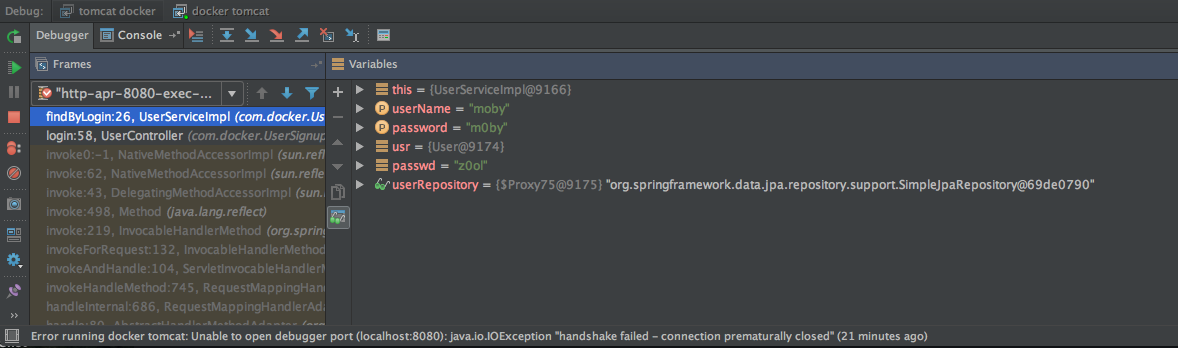
In this MVC application the UserController uses the findByLogin method in the UserServiceImpl class which uses the findByUsername method to retrieve the information from the database. It then checks to see if the password from the form matches the user password. Since the password from the login form is not scrambled using ROT13, it does not match the user password and you cannot log into the application.
To fix this, apply ROT13 to the password by adding
import com.docker.UserSignup.utit.Rot13

String passwd = Rot13.rot13(password);
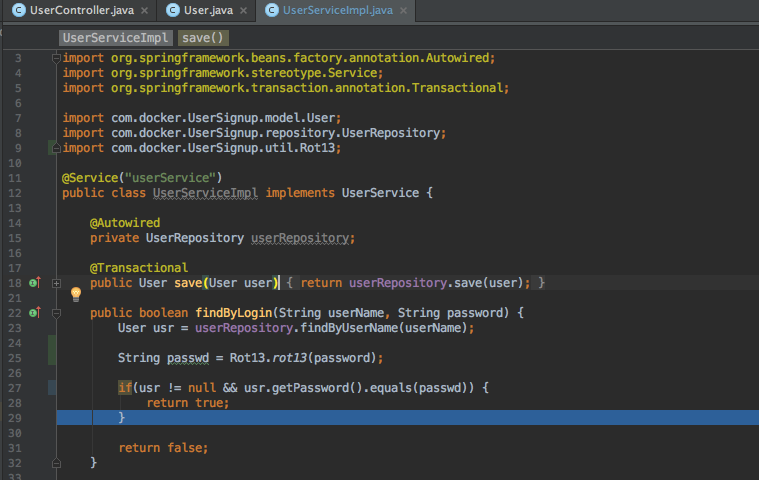
Set a breakpoint in UserServiceImpl on the findByLogin method. Log in again and look at the values for the breakpoint. The ‘passwd’ variable is z0ol which matches the password for the user moby.
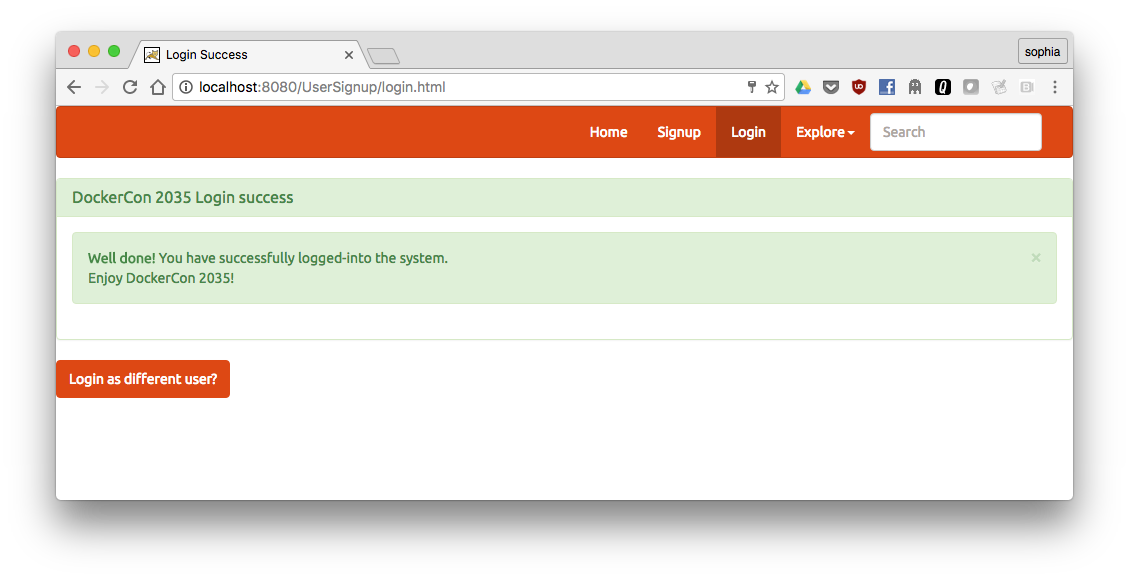
Continue (F8) and you should successfully log in.
True or false: You have to restart a container after you make changes to the code or they won’t be reflected in the application
- ( ) True
- (x) False
True or false: Debugging a Java app running in a container requires a special plugin for the IDE
- ( ) True
- (x) False


