Windows Containers Setup
Setup
There are four environments you can use to set-up Windows Containers. We have provided separate guides for each:
- Windows 10 with the Anniversary Update
- Windows Server 2016 on Azure
- Windows Server 2016 on AWS
- Windows Server 2016 on bare metal or in VM
See also:
See the Microsoft documentation for more comprehensive instructions.
Setup - Windows 10
This chapter explores setting up a Windows environment to properly use Windows containers on Windows 10.
Windows 10 with Anniversary Update
For developers, Windows 10 is a great place to run Docker Windows containers and containerization support was added to the Windows 10 kernel with the Anniversary Update (note that container images can only be based on Windows Server Core and Nanoserver, not Windows 10). All that’s missing is the Windows-native Docker Engine and some image base layers.
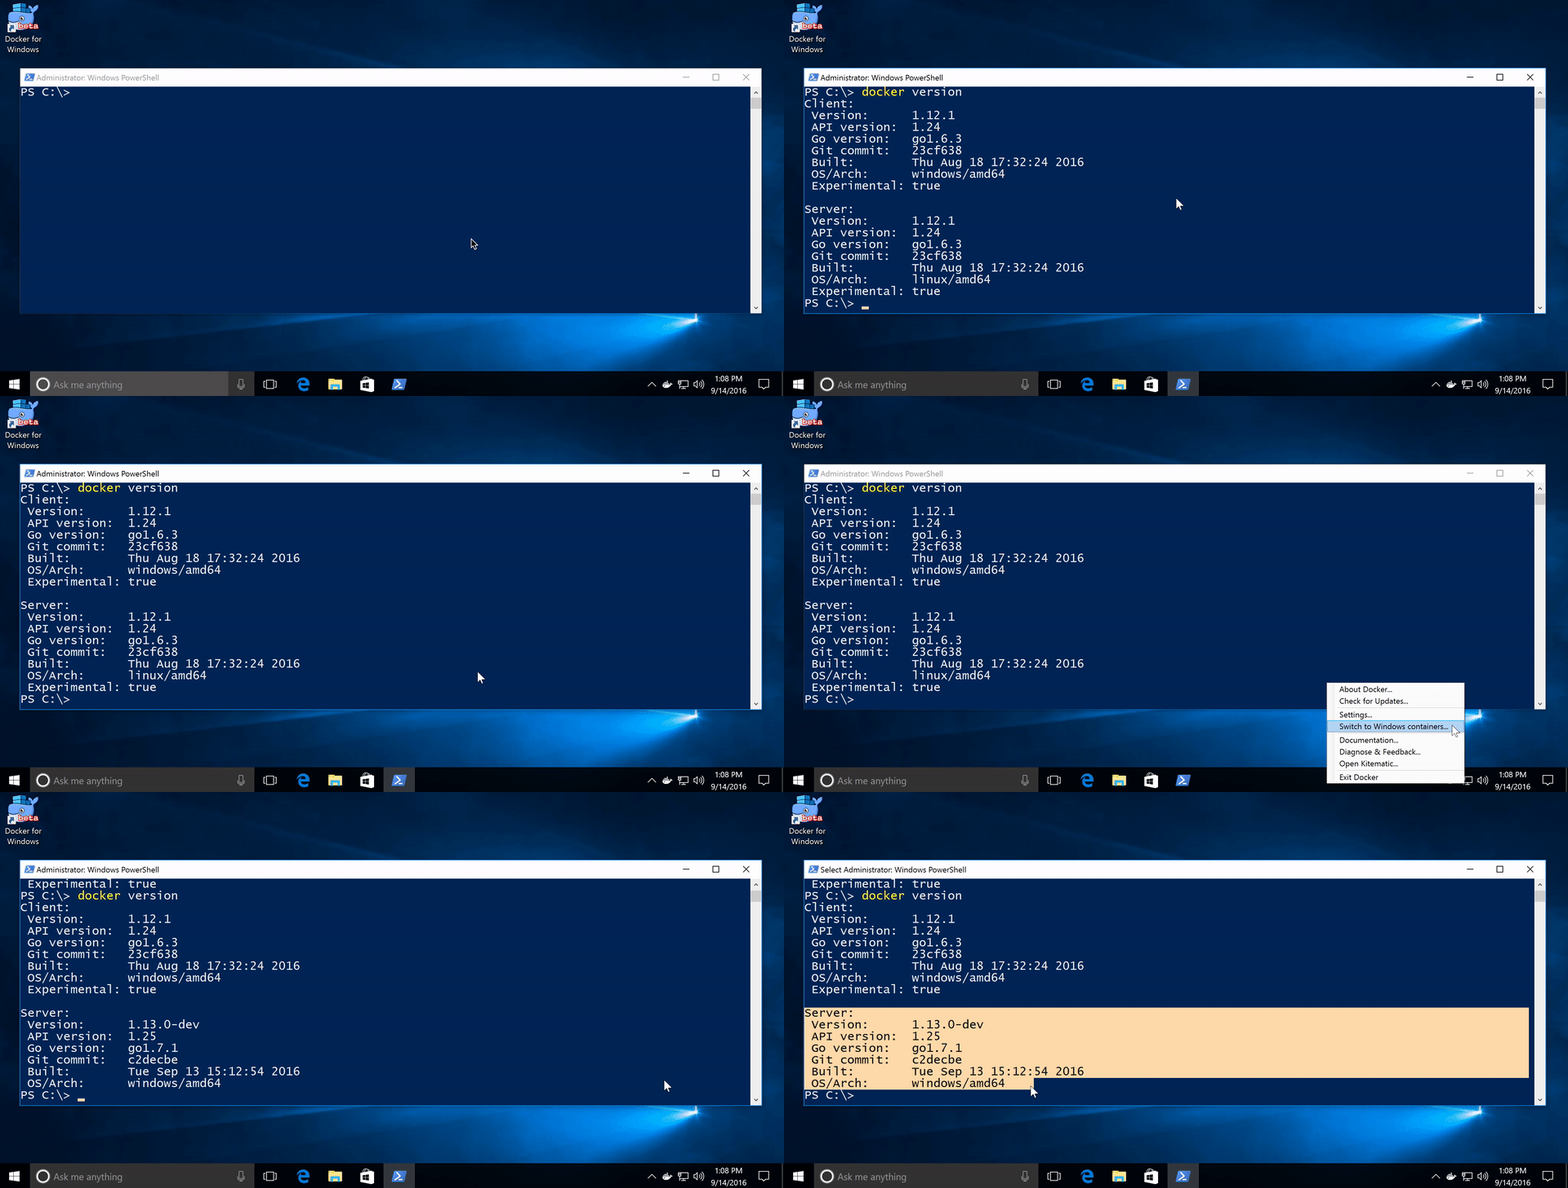
The simplest way to get a Windows Docker Engine is by installing the Docker for Windows public beta (direct download link). Docker for Windows used to only setup a Linux-based Docker development environment, but the public beta version now sets up both Linux and Windows Docker development environments, and we’re working on improving Windows container support and Linux/Windows container interoperability.
With the public beta installed, the Docker for Windows tray icon has an option to switch between Linux and Windows container development.

You can skip the rest of this lab.
Setup - Azure
This chapter explores setting up a Windows environment to properly use Windows containers on Microsoft Azure.
Windows Server 2016 on Azure
Microsoft Azure has a pre-baked VM image with Docker engine and base images pre-loaded. To get started (requires Azure account):
- Create a Windows Server 2016 Datacenter - with Containers VM. This VM image has Docker pre-installed and the Windows base layers pre-loaded.
- Select “Classic” deployment model and hit “Create”
- Input setup parameters
- Default settings are good
- Creating a new resource group is fine
DS2_V2instance type has good performance for development and testing
- Check the Summary and hit “OK”. Setup will take a couple of minutes
- Once the VM is running, select “Connect” to open a remote desktop connection. If using macOS, get the free Remote Desktop app in the Mac App Store
- Login with the username and password configured during setup
- Start PowerShell
Start-Service docker- Check that Docker is running with
docker version
You can skip the rest of this lab.
Setup - AWS
This chapter explores setting up a Windows environment to properly use Windows containers on Amazon Web Services (AWS).
Windows Server 2016 on AWS
AWS has a pre-baked AMI with Docker Engine already installed. To start an instance, do the following (requires AWS account):
- Open the EC2 launch-instance wizard
- Select the “Microsoft Windows Server 2016 Base with Containers” AMI
- Input setup parameters
c4.largehas good performance for development and testing- The default AWS security group settings will let you connect with Remote Desktop
- Select “Review and Launch”
- Once the VM is up, hit “Connect”. If using macOS, get the free Remote Desktop app in the Mac App Store
- See details on getting the initial Windows Administrator password for your AWS instance
- Start PowerShell
- Check that Docker is running with
docker version
You can skip the rest of this lab.
Setup - Windows Server 2016
This chapter explores setting up a Windows environment to properly use Windows containers on Windows Server 2016, on bare metal or in VM.
Windows Server 2016 on bare metal or in VM
Windows Server 2016 is where Docker Windows containers should be deployed for production. For developers planning to do lots of Docker Windows container development, it may also be worth setting up a Windows Server 2016 dev system (in a VM, for example), at least until Windows 10 and Docker for Windows support for Windows containers matures. Running a VM with Windows Server 2016 is also a great way to do Docker Windows container development on macOS and older Windows versions.
Once Windows Server 2016 is running, log in, run Windows Update (use sconfig on Windows Server Core) to ensure all the latest updates are installed and install the Windows-native Docker Engine (that is, don’t use “Docker for Windows”). There are two options: Install using a Powershell Package (recommended) or with DSC.
PowerShell Package Provider (recommended)
Microsoft maintains a PowerShell package provider that lets easily install Docker on Windows Server 2016.
Run the following in an Administrative PowerShell prompt:
Install-Module -Name DockerMsftProvider -Force
Install-Package -Name docker -ProviderName DockerMsftProvider -Force
Restart-Computer -Force
PowerShell Desired State Configuration
If interested in experimenting with Windows PowerShell Desired State Configuration, Daniel Scott-Raynsford has built a prototype script that uses DSC to install Docker Engine.
Here’s how to use it:
Install-Script -Name Install-DockerOnWS2016UsingDSC
Install-DockerOnWS2016UsingDSC.ps1
See Daniel’s blog post for details on installing Docker with DSC.
Whether using the PowerShell Package Provider or DSC, Docker Engine is now running as a Windows service, listening on the default Docker named pipe.
For development VMs running (for example) in a Hyper-V VM on Windows 10, it might be advantageous to make the Docker Engine running in the Windows Server 2016 VM available to the Windows 10 host:
# Open firewall port 2375
netsh advfirewall firewall add rule name="docker engine" dir=in action=allow protocol=TCP localport=2375

# Configure Docker daemon to listen on both pipe and TCP (replaces docker --register-service invocation above)
Stop-Service docker
dockerd --unregister-service
dockerd -H npipe:// -H 0.0.0.0:2375 --register-service
Start-Service docker
The Windows Server 2016 Docker engine can now be used from the VM host by setting DOCKER_HOST:
$env:DOCKER_HOST = "<ip-address-of-vm>:2375"


